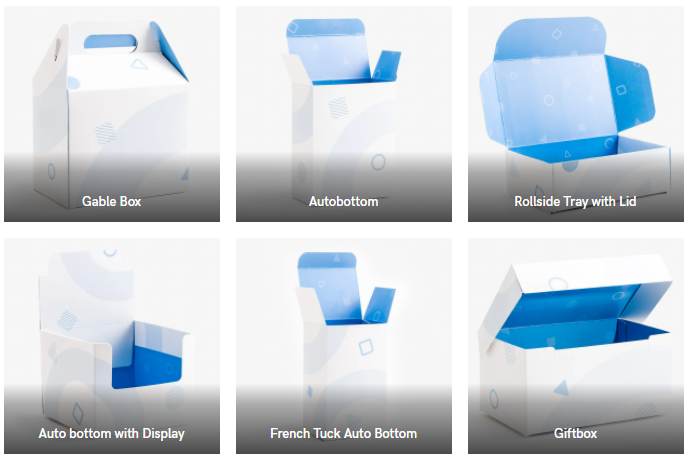
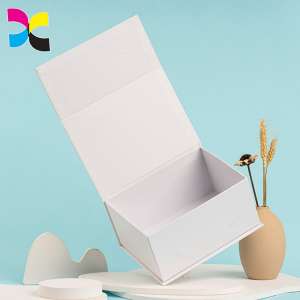
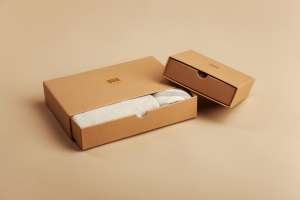
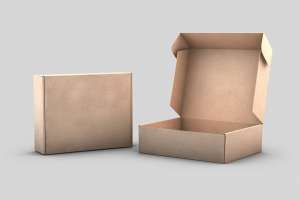
Product packaging has played a crucial role in the consumer decision-making process during a retail or e-commerce buying experience.
According to a study by The Paperworker, about 52% of online consumers would most likely return to a business if they received their product in high-quality packaging, and 74% of consumers will most likely share a photo of product packaging in their social media.
As you can see, an effective product packaging design can create tons of leverage for your business.
Bringing new packaging ideas to life, however, can be a daunting task, and there are so many factors to take into consideration. Luckily, we created a comprehensive guide to take you through every step of the process in the simplest way.
“Improving the unboxing experience is an exciting challenge at the forefront of brand marketers and packaging designers’ minds everywhere. Personalization should be at the top of your list of ideas. Brands, it’s time you let your personality show!”
Preparing for Your Packaging
Before diving straight into the process, an assessment of your product packaging needs is required to determine:
- What your options are
- The production and shipping costs
- What would be the best product packaging solution for your product
Assessing Your Packaging Needs
There are four essential questions that you must answer before continuing with the process:
A. What type of product is it?
The type of packaging will vary depending on your product based on size, shape, and weight. If your product is fragile, then you would need to consider a solution with more structure and cushioning.
B. How many units are needed?
Will you need 100 units? 500? 1,000? 10,000? These are numbers that you should make a note of as it will directly affect your costs and business requirements.
C. What is your budget?
The budget will include the cost of packaging and shipping. If packaging fillers are required, that should also be accounted for.
D. What is your marketing and business timeline?
This will depend on when you need the packaging. Things to consider are your anticipated launch dates and current inventory levels.

Note: If you still have any questions regarding the preparation stage, feel free to reach out to our product specialist.
Measuring the Box
Box dimensions are a critical part of any package as the dimensions of a box have an impact on the materials that are required, the cost of production, the cost of shipping, etc.
The three main dimensions by which boxes are measured include length, width, and depth. These measurements are always measured from the inside of the box and not the outside!
Measuring your box may seem like a simple task but the accuracy of this step determines the flow of your whole packaging journey. In other words, make sure you accurately determine the measurements correctly from the get-go.
Pro-tip: Try to minimize your dimension as much as possible. This will allow the product to fit snugly to avoid transportation damages and most importantly, help reduce your carbon footprint.
Types of Product Packaging
Folding Carton
Folding carton is the lightest and most flexible style out of the other paper materials making it a super cost-effective option.

Corrugated
Corrugated packaging is a highly durable option that is mainly used for heavy-duty products and shipping.

Material Thickness for Corrugated Board
Based on the product use (whether for retail or e-commerce), dimension size and/or structure, you will need to determine the required flute to hold your products safely. The thicker the flute, the more durable the packaging is (F-flute being the thinnest and B/C flute the thickest).

Rigid (Premium)
If you’re looking for high-end, premium product packaging with a luxurious feel, then rigid boxes are your best bet.
They are much thicker in terms of material (uses greyboard) compared to folding carton and are usually wrapped with offset printed paper instead of the artwork being printed directly on the greyboard material.

Other Styles
There are other packaging options your business can consider if boxes aren’t for you or you require a multi-packaging solution for your product line. The options are unlimited, but here are some popular options you can supplement your packaging boxes with:
Paper bags are a popular choice that is cost-effective and environmentally friendly.
Poly mailers are also cost-effective and an excellent choice for e-commerce businesses with smaller products that don’t require a lot of protection
Plastic packaging comes in many forms, such as boxes, bottles, bags, tubs, and more!
Glass packaging has a luxurious advantage over plastic packaging. Another plus is that they’re reusable!
Looking to Go for a Greener & Eco-Friendly Design?
Kraft (brown) is a great option for folding carton and corrugated packaging. It is durable, eco-friendly and typically uses 100% recycled material making it a popular choice for many brands that are continually pushing for a greener approach to their supply chain.

Protective Inserts
For extra product protection and organization, your business can consider inserts for your product packaging design. Here are three popular choices you may be familiar with!
Foam inserts protect fragile items during the shipping process and also adds a luxurious touch. They add value to the unboxing experience.
Plastic tray inserts, also known as blister inserts, are a lightweight and flexible option to protect your product during the shipping process. It is possible to get high definition details out of this material option by thermoforming which uses heat to manipulate the shape of the insert.
Cardboard inserts are a great cost-effective option and can be printed on for added value as opposed to the other two insert options. You will often find cardboard being used as custom inserts, dividers or partitions.
Molded pulp inserts are the most sustainable option. Untreated molded pulp is compostable, and will often be biodegradable. Even though some molded pulp may be treated or bleached, it remains a highly eco-friendly option compared to other materials.
Printing Options
After determining what type of product packaging is best for your business, you can determine what type of printing to go for. To break it down, these are the three printing options and what type of material they’re compatible with:
Offset Printing
Offset Printing uses ink instead of toner (digital printing), resulting in a richer, clearer and more superior image quality—ultimately the highest quality printing option. It is typically used for mass production, as it can get too expensive for most low-volume projects because it requires printing plates and additional setup fees.
Another perk of using offset printing is the ability to apply special processes. It is available for all three types of box materials and is able to produce the highest quality print.
Digital Printing
Digital Printing is just like how your home office laser or inkjet printer works. It offers quicker turnaround times and makes low-volume jobs affordable without any setup fees.
The only downside is that they can’t quite match the color fidelity and material flexibility that offset printing offers. It is available with folding carton and corrugated boxes.
However, with new trends and innovations, “advances in digital printing for corrugated can now enable customization to be executed efficiently at scale” according to Sara Dunn, of NAPCO Media. The growth in digital printing is remaining strong until 2024!
Flexography Printing
Flexography Printing is considered to be the modern-day letterpress and can withstand large quantities of packaging products like offset printing.
It is a form of industrial printing that is best for simple structures and printing one or two colors.
The colors aren’t as vibrant and crisp as the other two options, but this format of printing is inexpensive, it doesn’t require a lot of attention to detail and can be produced at very high speed.
Understanding Colors in Printing
CMYK stands for Cyan, Magenta, Yellow, and Key (Black). This is the default and only color output for printing. It allows you to create unlimited artwork possibilities.

Pro-tip: Working in CMYK color mode when doing your design on programs such as Adobe Illustrator or Photoshop provides a more accurate color appearance when printing on paper, which is why it is highly recommended that designers do not work in RGB color mode.
PMS, also known as, Pantone Matching System (or spot color), is a standardized color matching system by Pantone Inc. It is an excellent choice for branding as it creates a uniform color code, printing a wider range of colors with high consistency.
However, it typically requires an additional cost for production.
Pro tip: If you want all of your colors to be consistent for every print no matter where you get your packaging printed from, Pantone spot colors is the best choice.
Paper Coating
A coating can be applied to complete the look while offering additional packaging protection and enhancement to the print quality.
Lamination (Matte & Gloss) is the best of both worlds because it can help achieve the ultimate matte & glossy finish. Matte has no sheen while gloss provides a very impactful shine. Gloss lamination also provides better protection against moisture and dust, unlike Matte.
AQ (Aqueous) Coating is a clear, water-based coating that is capable of drying fast. It is environmentally-friendly, making it a great choice for food, household, and fast-consuming products. It has a very faint gloss finish compared to UV coating and lamination.
UV Coating can create a similar look to lamination but the difference is that UV can be applied directly the material (no additional film like lamination).
Varnish is the most cost-effective compared to other coating types and has the least efficient in durability. It can also produce matte, gloss and other coating effects. Least popular out of the four options.
Let’s also not forget about metallic, pearlescent, and soft-touch (velvet) coating. These specialty coatings have also become a popular choice for brands when creating a design edge to their packaging.
“Looking at it through a designer’s lens, it comes down to the premium look and feel of the materials. The subtle embossing of the logo, or a touch of glossy spot varnish over a matte finish. The rigid thickness of the outer shell. The way all of the interior components have a nicely tailored fit to the molds.”
Special Finishing
If you are looking to enhance and add a more impact look & feel to your packaging, you can opt for special processes to create a more eye-catching unboxing experience.
Foil Stamping: This process can be added to create a distinct look for your packaging. If you’re looking to add any metallic, matte gloss, holographic or special effects features, then foil stamping could do that for you.
Spot UV: Just like UV coating, but it is applied to a specific area of the packaging, rather than coating the entire surface.
Embossing: Add dimension and depth to your packaging by utilizing embossing. It is the process of raising textual content or an image by pressing into the card stock or paper.
Debossing: The opposite of embossing, debossing creates a depressed imprint on card stock or paper surfaces.
Window patching can be added to your packaging if you have an eye-catching product that deserves to be on display!
Packaging Design
To draw attention and evoke positive consumer response, it needs to be well designed.
If you don’t have a designer on hand, here is a list of companies you can outsource your graphic designs to:
- 99designs
- DesignCrowd
- Designhill
- Upwork
- Envato
If you are looking for a more streamlined process to get your packaging done more efficiently, it is also advisable to work with a manufacturer that can provide packaging & structural design services as well.
Dieline and Artwork Preparation and Requirements
Now that you have your design in place, it’s time to transfer it to the structure template, a.k.a, the dieline.
There are a few dieline and artwork preparation and requirements that need to be noted by your designated designer, even if your artwork is done and ready to go.
Dielines
A dieline is typically created on a computer with a designing tool such as Adobe Illustrator, Artioscad and/or Adobe InDesign. Be sure to be precise with the measurements and specifications to save time and money.

Artwork Preparation
To make it easier for you, we have a step-by-step guide to set up your artwork file with PakFactory’s dieline.
When working with a design, your artwork should be a vectorized format, which is made up of mathematically described lines. In simplest terms, they can be edited and scaled without losing image quality.

The only time you should be using a rasterized file is if it’s a photographic image, as they need the individual pixels to replicate real-life images being captured. For optimal quality, ensure that the resolution is set to 300 DPI.
Info: Need more clarification on preparing your artwork? Reach out to Bonroy if you need help with any of your designs!
Prototyping
If you want the extra assurance or need to finalize with your team before going into full production, you can request a custom sample box or 3D mock-up. We always recommend requesting a prototype to confirm the structure and printing for final production if you have a very large order.
Production and Shipping
Once you finalize everything, your product packaging is ready to go into full production. You can sit back, relax, and wait for the arrival of your packaging! Receiving your shipment all depends on your requested timeline, the size of the package, the method of delivery, etc. It is different depending on your situation, but your account manager will keep you up-to-date with the production and shipping process, ensuring that you are always on track.
Pro Tip: If you need to order on a consistent basis, speak to your product specialist to map out your inventory expectations and schedule. This will make it easier to maintain a healthy inventory flow and allow the manufacturer to know exactly when you need it.
Conclusion
Now you are ready to kick off your product packaging! In this guide, we covered all the fundamentals and details to simplify the process. Let’s recap what we have learned:
1. Preparing for your Packaging: An assessment of your product packaging needs to determine what your options are and what would be the best packaging solution for your product.
2. Measuring the Box: Box dimensions are a critical part of any package. We included a step-by-step video to precisely measure the inner and outer dimensions of your box.
3. Type of Packaging: What type of product packaging will you go for and why?
4. Printing Options: We break down the differences between digital, offset and flexography printing in the simplest terms for a better understanding and to determine the best for you.
5. Coating and Special Processes: A wide variety of coating and special processes can be added for extra protection and design touch!
6. Packaging Design: To make your packaging draw attention and evoke positive consumer response, it needs to be well designed. We threw in a few resources to help you get the ball rolling.
7. Dieline and Artwork Preparation and Requirements: The dieline is the blueprint to produce the final product. With our dieline library and artwork preparation protocols, you are well on your way!
8. Prototyping: Request a prototype to confirm the structure and printing for final production if you have a very large order. You have the option of requesting a sample box or a 3D mockup.
9. Production and Shipping: Your account manager will keep you up-to-date with the production and shipping process, ensuring that your packaging is completed in a timely manner.
Source:pakfactory


